Announcement

Collapse
No announcement yet.

New Acrylic Arboreal Enclosures

Collapse
X
 
  • Filter
  • Time
  • Show
Clear All
new posts

  • New Acrylic Arboreal Enclosures

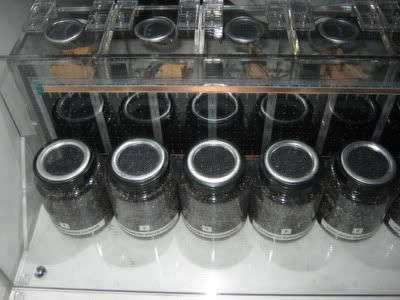
    Hi guys. I finally got round to finishing the enclosures I started building in August! Just not enough hours in the day unfortunately. Anyway, there all done now. There are 12 in total. Each one is made entirely from 5mm Extruded Acrylic. The edges of the sheets have been "Diamond Polished" which gives them a nice shiny look. This also helps give a stronger bond and a water tight seal on all my joints.


    I'm using a 45" x 6" Heat Strip attached to a stand which heats the back wall of the enclosures. I also heat some of my sling pots from the heat coming off the other side. So 12 tanks and 14 pots heated off one heat pad. See below.


    Let me know what you think.

    Jamie
    My Collection:

  • #2
    Very nice mate, they look stonking! Thanks for the tips on the cuts/polishing the edges and adhesive.

    Comment


    • #3
      Very impressive job youve done there.

      What was the total cost for all 12 not including the blood, sweat and tears ?

      Comment


      • #4
        No problem Lee, good luck.

        Thanks Peter The total cost was about £180 for all the materials including the adhesive solution and other bits and bobs I needed. (rough number) It sounds expensive, but for 12 enclosures it works out to be about £15.00 each which is pretty good considering the quality. I put alot of time and effort into building and designing them, but I love doing it. To me it's all part of the hobby.

        Jamie
        My Collection:

        Comment


        • #5
          very professional looking those, excellent job!.... what glue/sealant did you use to bond the acrylic?

          Comment


          • #6
            Originally posted by Aragorn Davies View Post
            very professional looking those, excellent job!.... what glue/sealant did you use to bond the acrylic?
            Thanks! I use dichloromethane. It has the consistancy of water and is applied using a syringe and needle. It can only be used on flat surfaces and won't fill gaps. I have to mention that you get no second chances with this stuff! Once applied it bonds almost immediately so if you've never used it before I would recommend having a few practice goes on some scrap sheets first.

            Also wear the protective disposable gloves that it comes with as you really don't want this stuff on your skin and only use it in well ventilated areas. It's horrible stuff Click the link below


            Jamie
            My Collection:

            Comment


            • #7
              looks like good stuff, how long before the tanks become safe for use with the T's?, and do you use any silicone or anything like it to run a bead on the inside to fill any gaps?, or just prep up the surface to be the best fit possible so no need to gap fill, sorry for all the questions...

              Comment


              • #8
                Originally posted by Aragorn Davies View Post
                looks like good stuff, how long before the tanks become safe for use with the T's?, and do you use any silicone or anything like it to run a bead on the inside to fill any gaps?, or just prep up the surface to be the best fit possible so no need to gap fill, sorry for all the questions...
                No worries! Although it bonds immediately it does take 24 hours to fully set. But I give the tanks a good week to fully air incase there are any toxic fumes lingering.

                Because the acrylic sheets are cut by specialists they are basically perfect therefore no gap filling is needed. They are even water tight. However I do use "Aquarium Silicone" to attach the vents and you do need to let that air for about a week also. If you do use silicone, don't use anything other than the "Aquarium" silicone. Hope this helps.

                Jamie
                My Collection:

                Comment


                • #9
                  a great deal! they are superb and inspiring, many thanks for the help and the link and if you can think of anything else to aid a novice in the realm of T husbandry it would be greatly received.. If you don't mind i may try something similar for my terrestrial T's, lol well i have no arboreal T's ....as yet!! Be nice to see some shots of your display units fully occupied to..

                  Comment


                  • #10
                    Originally posted by Aragorn Davies View Post
                    a great deal! they are superb and inspiring, many thanks for the help and the link and if you can think of anything else to aid a novice in the realm of T husbandry it would be greatly received.. If you don't mind i may try something similar for my terrestrial T's, lol well i have no arboreal T's ....as yet!! Be nice to see some shots of your display units fully occupied to..
                    I'm glad to have been of help. Yeah go for it. PM me if you need anything. Yes I'll have to post some pics of the new occupants. Will get onto that!

                    Jamie
                    My Collection:

                    Comment


                    • #11
                      AWESOME! Nice work Jamie. All the hard work has paid off.
                      Brachypelma vagans 0.0.1
                      Lasiodora parahybana 0.0.1
                      Grammostola rosea 0.1.0
                      Poecilotheria regalis 0.0.1
                      Poecilotheria rufilata 0.1.0
                      Brachypelma smithi 0.1.0
                      Avicularia versicolor 0.0.1
                      Psalmopoeus irminia 0.0.1
                      Aphonopelma schmidti 0.1.0
                      Chromatopelma cyaneopubescens 0.0.1
                      Acanthoscurria geniculata 0.0.1

                      Comment


                      • #12
                        They look awesome Jamie! Just the kick up the backside I need to make some myself!


                        Comment


                        • #13
                          Originally posted by Chris Barnard View Post
                          AWESOME! Nice work Jamie. All the hard work has paid off.
                          Thanks Chris! I got there in the end. Time to start planning the upgrades I suppose - LOL.

                          Originally posted by Stephen jordan View Post
                          They look awesome Jamie! Just the kick up the backside I need to make some myself!
                          Thanks Steve. Let me know if you do, I can save you some time sourcing all the parts.
                          My Collection:

                          Comment

                          Working...
                          X